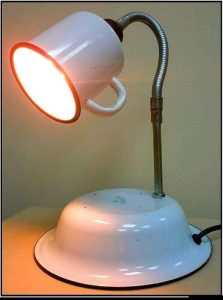
Creating a unique lamp from a milk can and a metal plate can be a fun and rewarding DIY project. Follow these detailed steps to craft your own milk can lamp.
Materials:

- Milk can (small or large, depending on your preference)
- Metal plate (preferably with a central hole)
- Electric lamp kit (with cord and bulb)
- Electric drill with a hole saw attachment
- Clamps
- Electrical tape
- Decorative materials of your choice (paint, beads, ribbons, etc.)
Step-by-Step Guide:
- Prepare the milk can: Begin by thoroughly cleaning and drying the milk can. Ensure it’s free of any residues.
- Mark the cable hole: Turn the milk can upside down, so the base is facing upward. Mark the spot where you want the hole for the cable to pass through.
- Drilling the hole: Using an electric drill equipped with a hole saw attachment, carefully drill the hole you marked in the previous step. Ensure the hole is large enough to accommodate the electrical cord.
- Mount the electric lamp kit: Thread the electrical cord through the hole you’ve created in the milk can. Then, assemble the electric lamp kit according to the instructions provided with it.
- Attach the metal plate: Place the metal plate on top of the milk can. If your plate doesn’t have a hole in the center, you may need to drill one to allow the cord to pass through.
- Secure everything in place: Use clamps to securely fasten the milk can, cord, and metal plate together. This ensures the stability of the lamp.
- Decorate your lamp: Now, you can unleash your creativity by adding decorative elements to your lamp. Paint it, glue on beads, attach ribbons – the choice is yours.
- Test the lamp: Before completing your project, plug the lamp into an electrical outlet and turn it on to ensure that it functions correctly and safely.
After following these steps, you’ll have a one-of-a-kind milk can and metal plate lamp. Remember to handle electrical components with care to ensure the lamp’s safety. Enjoy your new handmade creation!
Leave a Reply